


Key Highlights
- How do DTF transfers work: print, powder, cure, and heat press onto fabric.
- Follow a clear DTF transfer step by step method for best results.
- Proper DTF pre-press steps improve adhesion and durability.
- Use correct recommended DTF heat settings for long lasting prints.
- Final DTF prints finishing enhances look and feel.
If you’re new to garment printing, one of the first questions you’ll ask is, "How do DTF transfers work?" At first glance, it may look technical, but once you understand the process, it becomes simple, repeatable, and even enjoyable.
DTF printing is all about transferring designs from a printed film onto fabric using heat. What makes it special is its flexibility, you can print on cotton, polyester, blends, and more without complicated preparation.
In this guide, we’ll walk you through the complete DTF transfer process in a clear and practical way so you can confidently create high quality prints.
What Is the DTF Transfer Process?
The DTF transfer process involves printing a design onto a special film, applying adhesive powder, curing it, and transferring it onto fabric using heat.
Unlike other methods, pretreatment in DTF printing is minimal or not required at all. This makes it easier for beginners and faster for businesses.
Understanding how do DTF transfers work helps you avoid mistakes and achieve consistent results with every print.
DTF Transfer Step by Step
Let’s break down the DTF transfer step by step so you can clearly understand each stage.
1. Design Creation
Everything starts with your artwork. A clean, high resolution design ensures better output. This is the foundation of any successful DTF printing process guide.
If your design is not sharp, your final print won’t be either. This is especially important for anyone exploring DTF transfer for beginners.
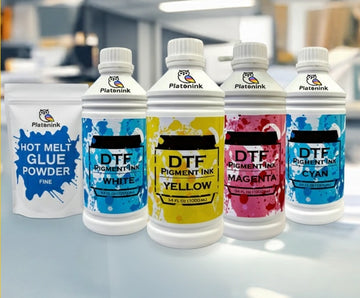
2. Printing on Film
Your design is printed onto PET film using specialized DTF inks. The printer lays down color layers followed by a white base layer.
This step is a critical part of the DTF transfer process, as it determines how vibrant and detailed your design will appear on fabric.
3. Applying Adhesive Powder
After printing, adhesive powder is applied to the wet ink. This powder sticks to the design and prepares it for transfer.
Skipping or poorly applying this step can affect the entire DTF transfer step by step workflow and lead to weak adhesion.
4. Curing the Printed Film
Curing is where the magic happens. The printed film is heated to melt the adhesive powder, making it ready for transfer.
Understanding curing DTF inks explained helps you control temperature and timing. Following a proper DTF curing technique guide ensures durability and flexibility in your prints.
Pre Press Preparation
Before applying the transfer, preparing your garment is essential. Proper DTF pre-press steps ensure better bonding and cleaner results.
Pre-Press Checklist
- Remove moisture from the fabric
- Smooth out wrinkles
- Clean lint or dust
- Preheat the garment briefly
These steps are part of prepping garments for DTF, and they significantly improve print quality.
How to Heat Press DTF Transfers
Now comes the most important step, transferring the design onto fabric. Knowing how to heat press DTF transfers correctly ensures professional results.
Basic Heat Press Steps
- Place the film on the garment
- Apply heat and pressure
- Wait for the recommended time
- Peel the film (hot or cold)
Using the right technique is key to mastering the DTF printing process guide.
Recommended DTF Heat Settings
Correct heat settings can make or break your print. Following recommended DTF heat settings ensures proper adhesion and durability.
Standard Settings
- Temperature: 150–165°C
- Time: 10–15 seconds
- Pressure: Medium to firm
Always test settings based on your materials to get the best results.
DTF Prints Finishing Techniques
After pressing, finishing steps enhance the final look and feel of your design. Proper DTF prints finishing ensures durability and a professional appearance.
Finishing Tips
- Repress with parchment paper
- Allow proper cooling time
- Check edges for full adhesion
These small steps complete the DTF transfer process and improve overall quality.
Common Mistakes Beginners Should Avoid
If you’re learning how do DTF transfers work, avoiding common mistakes can save you time and materials.
- Skipping pre press preparation
- Incorrect curing temperature
- Using wrong heat settings
- Poor quality materials
- Rushing the process
These issues often affect results for those starting with DTF transfer for beginners.
Why DTF Printing Is So Popular
DTF printing is growing rapidly because it’s simple, flexible, and efficient. It works on various fabrics and doesn’t require complex setup.
For small businesses and beginners, this method offers a reliable way to produce high quality prints using a straightforward DTF printing process guide.
Tips for Better Results
To get the best output from your DTF transfer process, focus on consistency and detail.
- Use high quality designs
- Maintain your equipment
- Follow proper curing techniques
- Test before bulk production
These tips help you master the DTF transfer step by step process and improve your results over time.
Conclusion
DTF printing is one of the easiest and most effective ways to create custom apparel today. By following the correct steps, using proper materials, and applying the right techniques, you can achieve professional results consistently.
Whether you’re a beginner or looking to improve your workflow, mastering the process will set you apart. If you’re ready to take your printing to the next level with reliable solutions, explore Bostonian DTF.
FAQs
1. How do DTF transfers work step by step?
DTF transfers work by printing designs on film, applying adhesive powder, curing, and heat pressing onto garments. Each step ensures proper bonding and vibrant, long lasting print results.
2. What is the DTF transfer process?
The DTF transfer process involves printing a design on film, applying powder, curing it, and transferring it onto fabric using heat and pressure.
3. What are DTF pre press steps?
DTF prepress steps include removing moisture, flattening fabric, and cleaning the surface. These steps ensure better adhesion and improve overall print quality.
4. What is pretreatment in DTF printing?
Pretreatment in DTF printing is minimal compared to other methods. Most fabrics do not require chemical pretreatment, making the process easier and more beginner friendly.
5. How to heat press DTF transfers:
Place the transfer on fabric, apply correct heat and pressure, and press for the recommended time. Proper technique ensures strong adhesion and prevents peeling or fading.
6. What are recommended DTF heat settings?
Recommended DTF heat settings are usually 150–165°C with medium pressure for 10–15 seconds. Always test settings to match your materials and achieve optimal results.
7. What is curing DTF inks explained?
Curing DTF inks means heating the printed film to melt adhesive powder. This prepares the design for transfer and ensures durability and flexibility after pressing.
8. What is the DTF curing technique guide?
A DTF curing technique guide explains temperature and timing control during curing. Proper curing ensures strong bonding and prevents cracking or peeling in final prints.
9. What is DTF print finishing?
DTF print finishing includes repressing, cooling, and checking adhesion. These steps improve durability and give the final product a smooth, professional appearance.
10. Is DTF transfer for beginners easy?
Yes, DTF transfer for beginners is easy to learn. The process is simple, requires minimal setup, and allows new users to create high quality prints with practice.


