
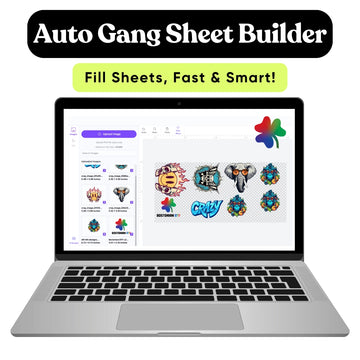
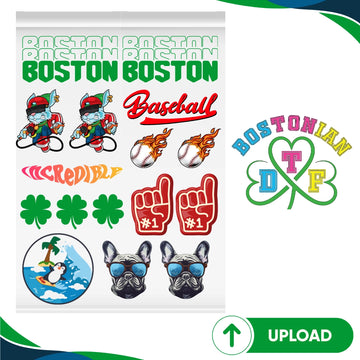

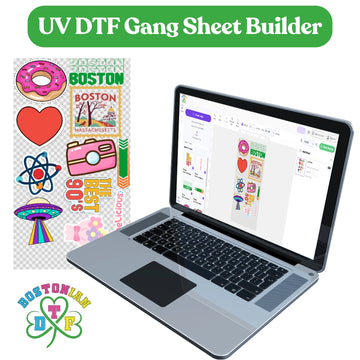



A strong DTF gang sheet layout fits correctly sized artwork into the available print area while leaving enough room to cut every transfer cleanly. Start with the largest graphics, trim useless transparent canvas, rotate designs where it helps, then use smaller logos and labels to fill leftover areas. Never shrink a transfer just to fill the sheet. For Boston-area production, Bostonian DTF currently offers an online builder with 22-inch-wide sheets from 10 to 300 inches long, live layout tools, plus specialty film choices.
Gang Sheet Layout Tips for More Usable Transfers
The goal is not to cover every pixel of film. The goal is to get the highest number of usable transfers from the sheet without creating cutting or production problems.
- Set every design to its final print dimensions before arranging anything.
- Remove unnecessary transparent space around PNG artwork.
- Place the largest designs first because they control the layout.
- Rotate rectangular graphics when orientation creates a better fit.
- Use small logos, sleeve prints, and labels to fill awkward spaces.
- Leave practical cutting room between neighboring designs.
- Keep every graphic inside the sheet boundary.
- Preview the whole sheet before submitting the order.
The current builder supports 22 x 10 through 22 x 300-inch options and describes drag, resize, flip, and live-preview controls.
What Makes a DTF Gang Sheet Layout Efficient?
An efficient gang sheet layout balances film use with production ease.
You want fewer empty areas, but you also need artwork that remains correctly sized and transfers that can be separated without damaging nearby designs.
Start With Final Print Size
This is the first rule of the DTF gang sheet layout guide.
If a chest logo must print 4 inches wide, make it 4 inches wide before arranging the sheet. If an adult back graphic needs to print at 11 inches, keep it at 11 inches.
Do not build the sheet first and resize everything afterward.
That reverses the production logic.
Why Should Large Designs Go on the Sheet First?
Large graphics create the basic structure of the sheet.
Imagine a sheet containing four 11-inch back designs, ten chest logos, eight sleeve graphics, plus several neck labels. If you place all the tiny pieces first, you may create gaps that the large artwork can no longer use.
Treat Large Artwork Like Furniture
Think about moving into an apartment.
You place the sofa before deciding where the coffee mug goes.
The same logic creates a better best DTF gang sheet layout. Put full-front and back graphics in position first. Then work smaller artwork into the remaining spaces.
Simple... but it changes everything.
How Much Space Should You Leave Between Designs?
A useful DTF gang sheet spacing guide should focus on cutting, not just printing.
There is no universal gap that fits every production method. Scissors, rotary cutters, and other workflows need different amounts of clearance.
A quarter inch between uncomplicated designs can be a practical planning starting point, but it should not be treated as a fixed specification for every order.
More Space Is Not Always Waste
Two transfers placed almost against each other may save a tiny strip of film.
Then somebody has to cut them apart.
If saving a fraction of an inch creates slow cutting or damaged artwork, the layout has not really saved anything.
That is the production test that matters.
How Does Transparent Space Waste a Gang Sheet?
Transparent pixels may be invisible, but the artwork file can still occupy a large rectangular area.
Suppose a 4-inch logo sits in the middle of a 10-inch transparent canvas. If your layout software treats the full canvas as the object boundary, you can lose useful room around it.
Trim the canvas close to the actual artwork before uploading.
Check Resolution at Final Size
The current pre-made sheet guidance recommends high-resolution PNG files at 300 DPI with transparent backgrounds.
Adobe also identifies 300 pixels per inch as a standard target for detailed print output and recommends preparing artwork at the final intended print dimensions.
Do not take a tiny image and simply enlarge it to fill an empty space. Bigger dimensions do not create missing detail.
Should You Rotate Artwork on a Gang Sheet?
Yes, when rotation improves the fit without changing the intended printed dimensions.
A 4 x 8-inch design may fit poorly in one direction but slide neatly beside another graphic when turned 90 degrees.
This is one of the simplest gang sheet layout tips for rectangular artwork.
Rotation Does Not Mean Resizing
Keep the design's physical dimensions intact.
Turning an 8 x 4 design into a 4 x 8 orientation is fine. Shrinking it to 3 x 6 because a small opening remains on the sheet changes the final garment print.
Do not let leftover film decide the customer's print size.
How Should Mixed-Size Designs Be Arranged?
Mixed DTF gang sheets give you the best opportunities for efficient nesting.
Large graphics create blocks. Medium graphics fill the next-largest areas. Small logos and labels finish the layout.
|
Artwork type |
Best placement approach |
Common mistake |
|
Large back graphics |
Place first |
Saving them until the end |
|
Full-front prints |
Build main rows |
Shrinking to fill gaps |
|
Chest logos |
Fit beside larger art |
Scattering them randomly |
|
Sleeve graphics |
Use narrow spaces |
Forgetting the cutting room |
|
Neck labels |
Fill small openings |
Making them too small |
|
Names or numbers |
Group by size |
Mixing versions without labels |
This approach improves gang sheet space optimization without turning the sheet into a cutting puzzle.
How Should Repeated Designs Be Organized?
Repeated artwork is easier to count when copies stay together.
If you need 30 chest logos, grouping them into visible rows makes quantity checking faster. The same applies to sleeve marks, labels, and repeated event graphics.
Keep Similar Designs in Production Groups
This matters when several files look almost identical.
Imagine adult and youth versions of the same logo. If they are mixed randomly across a long sheet, the cutting table becomes the place where mistakes happen.
Good DTF gang sheet artwork placement helps the person who will actually use the transfers later.
Layout is not just a design task. It is production planning.
Can a Gang Sheet Builder Reduce Empty Space?
A gang sheet builder can make layout work faster because you can upload separate graphics, resize them to intended dimensions, duplicate artwork, move pieces, and preview the sheet before ordering.
The current DTF gang sheet builder offers 22-inch-wide sheets in multiple lengths, currently from 10 to 300 inches, plus controls described for dragging, resizing, flipping, and reviewing the layout. The listed builder price currently starts at $4.80.
Current prices and availability can change, so check the live product before basing a customer quote on them.
Should You Use the Builder or Upload a Finished Sheet?
Both workflows can work.
A builder is convenient when you have separate graphics and want to arrange them online. A finished sheet gives experienced designers more direct control over the whole layout before upload.
The current pre-made option supports sheet lengths from 22 x 5 through 22 x 300 inches.
When Is a Finished Layout Better?
If you already know how to make a DTF gang sheet in Photoshop, Illustrator, or another design application, creating the whole canvas yourself can make repeat orders easier.
You can save the editable master file, labels, quantities, and artwork groups.
Next month, you change what needs changing rather than rebuilding everything.
How Do You Choose the Right Sheet Length?
Do not automatically buy the longest sheet.
Estimate how much area your actual artwork needs, then choose the shortest available length that fits the finished arrangement with safe cutting space.
|
Order type |
Layout priority |
|
Mostly large graphics |
Efficient rows |
|
Many small logos |
Tight but cuttable spacing |
|
Mixed client work |
Nest small designs around large ones |
|
Repeat merchandise |
Organized sections and labels |
|
Names and numbers |
Clear grouping |
|
Multiple garment sizes |
Separate artwork sizes visibly |
The current builder offers lengths of 10, 20, 30, 40, 50, 60, 70, 80, 90, 100, 150, 200, and 300 inches.
Does Filling More Space Always Save Money?
No.
Using more of the printable area can reduce wasted film, but only when every transfer on the sheet is useful.
Adding ten random logos that nobody needs does not improve the economics.
Measure Cost Per Usable Transfer
Suppose one sheet costs $30 and produces 60 transfers you actually need.
Your transfer cost from that sheet is $0.50 each before pressing labor and garments.
Now imagine squeezing 70 transfers onto the same sheet, but ten are unnecessary. Your real usable output is still 60.
Space utilization only creates value when it matches production demand.
What Is the Biggest Layout Mistake?
Trying to maximize space before confirming sizes and quantities.
We often see the logic behind the mistake. An empty corner looks wasteful, so the temptation is to stretch one design or squeeze another into it.
But an efficient DTF gang sheet should serve the garment order, not the other way around.
Confirm sizes. Confirm counts. Then optimize.
How Should You Prepare Artwork Before Uploading?
Use final artwork, not drafts.
Check spelling, names, dates, transparent backgrounds, final dimensions, plus resolution before the order enters production.
Adobe recommends 300 PPI as a standard print-resolution target and notes that enlarging an image can reduce effective detail.
Name Files Clearly
Use names such as:
Adult Back 11in
Youth Back 8in
Chest Logo 4in
Sleeve Mark 3in
You do not need those names printed on the sheet. You need them during layout so the wrong version does not get duplicated 40 times.
Why Does Smart Gang Sheet Planning Matter in Boston?
Boston's current 2026 Small Business Month information says the city is home to more than 18,000 small businesses employing 127,000 people and generating close to $28 billion each year.
Many of those businesses operate around repeat apparel needs, fixed events, staff uniforms, merchandise drops, and small production runs.
A Dorchester restaurant may need chest and back logos. A Cambridge organization could combine event prints, sponsor marks, and staff shirts. A South Boston fitness business may need hoodies, tees, plus sleeve graphics on one order.
A flexible sheet lets each job use space around the work it actually needs.
What Artwork Rights Should You Check?
Every graphic placed on a sheet should be artwork you created or have suitable rights to reproduce.
The U.S. Copyright Office explains that obtaining permission or a license is one way to make sure an intended use of copyrighted work is lawful.
That matters even more on gang sheets because one unauthorized graphic can be duplicated many times in a single production file.
Keep customer approvals or licenses with the order records. For uncertain copyright or trademark issues, consult a qualified attorney. This is practical production compliance guidance, not legal advice.
Conclusion
A better DTF gang sheet layout comes from planning in the right order.
Set artwork to final dimensions. Trim transparent canvas. Place large graphics first. Rotate where useful. Fill leftover areas with smaller designs. Leave enough room to cut everything cleanly.
Do not chase a completely full sheet.
Chase a useful one.
That is how DTF gang sheets save space without creating extra work at the cutting and pressing table.
FAQs
How much space should I leave between DTF gang sheet designs?
Leave enough space to cut each transfer without damaging neighboring artwork. A small gap such as a quarter inch can be a useful planning starting point, but the right spacing depends on your design shapes and cutting method.
How can I fit more designs on a DTF gang sheet?
Trim unnecessary transparent canvas, place large designs first, rotate rectangular graphics when helpful, then fill remaining openings with smaller logos, labels, or sleeve prints.
Should I rotate designs on a DTF gang sheet?
Yes. Rotation can improve the layout when it does not change the intended final print dimensions or create problems for your production workflow.
Should large or small designs be placed first?
Place large designs first because they control the main structure of the sheet. Smaller graphics can then fill spaces that remain around them.
Can different design sizes go on one DTF gang sheet?
Yes. Full-front graphics, chest logos, sleeves, neck labels, names, and other sizes can share one sheet when every design remains at its intended print dimensions.
Is a full gang sheet always better?
No. Packing a sheet too tightly can make transfers harder to cut and organize. A good layout balances material use with practical production.
What resolution should gang sheet artwork be?
The current pre-made sheet guidance recommends high-resolution PNG artwork at 300 DPI with transparent backgrounds. Artwork should be prepared at its intended final print size.
Can I reuse the same gang sheet layout for future orders?
Yes. Save the editable source layout and approved artwork. Before reordering, verify quantities, dimensions, names, branding, and artwork versions.


